Monday, February 22, 2016

“Sticks with Heads”

6th Grade Language Arts Lesson

In order to spice up the sixth grade’s reading of Shakespeare’s Julius Caesar in Language Arts, the LA teacher and I came up with a unique way to get students more involved with the text and increase understanding. The project is dubbed “Sticks with Heads.” The gist is that we are reenacting the play using celebrities glued to popsicle sticks.

Here is how the project works:
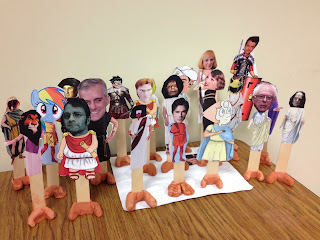
Characters from the book are randomly assigned to each student in the grade level. The grade level will make one complete set of Julius Caesar “Sticks with Heads” for the classes to share. Each student decides on an actor or actress to play the assigned character and writes up his or her justification for the casting. Once approval by the teacher is given, the “stick with head” is created by printing out and adhering a picture of the chosen celebrity’s head atop a typical Roman outfit on a popsicle stick.

Julius Caesar "Sticks with Heads"
Originally, the teacher wanted each class to record the entire play, but the time requirement needed would be substantial. With my suggestion to make this more manageable, each class is to be assigned only certain scenes to record. Then in editing, all of the scenes from each of the classes will be combined into one big movie encompassing the entire play. This twist to the filming creates an incentive to record quality scenes and excitement to later find out what the other classes have produced. Therefore, each class’s intended audience is the other classes.

The reenactment and recording of the play calls for a detailed examination of the setting, character interactions, and the characters involved in the different scenes. It also helps to justify and give purpose to the rereading of the scenes.
Monday, February 8, 2016

Making the Makerspace #3: Green Screen

I am on a journey to create a makerspace at my school in the preschool through 8th grade Technology classroom. This room has been off to a rocky start this year since new Technology classes were introduced, two teachers utilize the room (one being me), and all ages and sizes of students filter through the space. Of special note, the creation of the makerspace is being completed on a “dime” as there is no real budget allocation towards it.

Step 3: Green Screen

One item I wanted to make available for continuous student use was a green screen. We do have a green screen with a frame that belongs to another department in the school, but it takes coordination, time and adequate room to set it up.

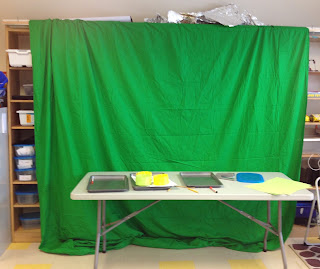
Cheap green screen in a maker spaceTo make a green screen available, I purchased my go-to inexpensive green screen cloth. It is a 10x12’ sheet with a rod pocket along the top. To hang it, a 3/4" x 10ft plastic pipe was threaded through the rod pocket and the pipe was placed over two nails that were hammered into the top of a bookshelf. To allow access to the shelves behind the green screen, two hooks were installed to enable the use of a “curtain tie-back” (twine).

Since my school has 1:1 iPads at the middle school level, students use their iPad to record. Various methods for propping up an iPad to record at the correct height are employed on a daily basis. I have seen everything from hooking the case over a plastic crate to placing the iPad on a small table or chair mounted on top of a table. To make this a little more professional, I purchased an inexpensive iPad mount adapter to attach to an old tripod we had at the school.

Even though the green screen scenes are recorded on an iPad, the green screen effect isn’t always edited in on the iPad. A few students have access to the Green Screen by Do Ink app that allows for editing on the iPad, otherwise the rest of the students transfer the video to a laptop and edit in iMovie (iMovie on the iPad does not allow for use of the green screen effect). In order to facilitate editing, I put together a direction sheet for iMovie and posted it near the green screen. Without calling attention to the existence of the directions, students seemed to easily find and use them without having to ask. Having students feel comfortable using the green screen functionality of the classroom on their own was the goal.