I keep going to back to utilizing Raspberry Pi computers to introduce Python coding skills in my middle school technology class. Why do I pick the Raspberry Pi over web-based options that can be accessed on devices we already have out and ready to go? In my experience, it is easy for students to get lost and off task on other devices that are connected to the Internet. The Raspberry Pi, thus far, seems to keep students on the task at hand while providing a sense of novelty. Also, in each class, I have the students collect the needed pieces and connect up their Raspberry Pi. This is in order to reinforce the parts of the computer and provide authentic tech troubleshooting skills.
We only have enough resources for seven Raspberry Pi computers. Students are required to collaborate and be able to work with others in pairs or groups of three for each project. This is beneficial in helping the students through the new concepts and making them more comfortable with coding. By the end, my goal is that all students appreciate and have a basic understanding of coding. They should feel that coding is something doable.
How do I organize the components for the computers?
 Monitors: Cords wrapped around screen and placed on shelf
Keyboards: Stacked on shelf
Mice: Stored in a drawer
Power Cord: Stored in a drawer
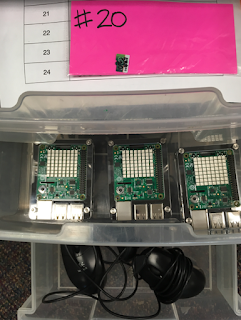
Raspberry Pi: Stored in a drawer
microSD cards: Cards are labeled with a number and placed in a bag labeled with the same number along with a piece of numbered card stock color coded by class. In the drawer is a sheet of paper which lists the classes and each group’s assigned microSD number.
Each group of students has their own microSD card, making it seem as if the computer was actually theirs. This cuts back on the potential issue of work disappearing between classes and allows students to take risks such as installing programs or changing settings as time allows.
Monitors: Cords wrapped around screen and placed on shelf
Keyboards: Stacked on shelf
Mice: Stored in a drawer
Power Cord: Stored in a drawer
Raspberry Pi: Stored in a drawer
microSD cards: Cards are labeled with a number and placed in a bag labeled with the same number along with a piece of numbered card stock color coded by class. In the drawer is a sheet of paper which lists the classes and each group’s assigned microSD number.
Each group of students has their own microSD card, making it seem as if the computer was actually theirs. This cuts back on the potential issue of work disappearing between classes and allows students to take risks such as installing programs or changing settings as time allows.
We regularly send students to search the web for various reasons and items. Why not try to improve and narrow down their results to websites you trust? Create your own search engine! Preload it with only the sites you want students to review for the particular visit. This is beneficial, especially with younger students who are not as savvy at navigating their way through reliable sources and, at times, can get lost in space. Plus, you can make sure that there are sites available for each student’s topic.
Google Custom Search Engine
- Use your Google account to save the search settings which can be edited/updated after it is first created
- Enter in as many websites as you need to have available
- Limit searching to an exact page, subset of pages, or an entire website
- Set up one or multiple totally different searches depending on the topic or class
- Remove ads after creating the initial search (school accounts are considered as nonprofit thus allowing ads to be turned off for free)
- Share the final “public” link with your class on Schoology or use a URL shortener to make it easier to type in
If your school has a learning management system, you most likely have access to some form of class discussion features. If not, there are several options out there to get a class or group discussion going. The first step is figuring out why you want to use online discussions and, then, the next part is determining how you and your students can use them effectively.
Ideas for using online discussions:
- Debate a topic, provide different views – practice citing sources
- Compare and contrast
- Take on a character and write in that manner
- Record orally or written conversations in a foreign language
- Provide numerous examples
- Continue classroom discussions
- Combine multiple classes into one discussion
- Support classroom assignments outside the school day
- Brainstorming
- Assign separately to student groups to facilitate communication
- Physical Education Example Uses for Schoology or FlipGrid
- Demonstrate digital citizenship
Practice online etiquette and how to respond to one another
- Create a writing journal between teacher and student
- Build a portfolio by assigning discussions individually
- 6 Blended Learning Examples For Online Discussions
Here are two options for taking discussions online: Schoology and Flipgrid
Schoology Discussion Feature – Responses can be written, images, files, or recorded video/audio from within the editor. Create one for the class, one for each student (could even act as a mini portfolio), or even share one discussion with multiple classes. Grading can be done right in the discussion itself if desired.
Flipgrid – A free website where responses are all completed in a video or audio format. Students can participate using a computer web browser or the free iPad app. Grids can be protected by letting only those with our school email addresses to access them along with the requirement to have the special code to join. Here is a resource on How to Use Flipgrid – From Sign-up to Video Sharing.
 Monitors: Cords wrapped around screen and placed on shelf